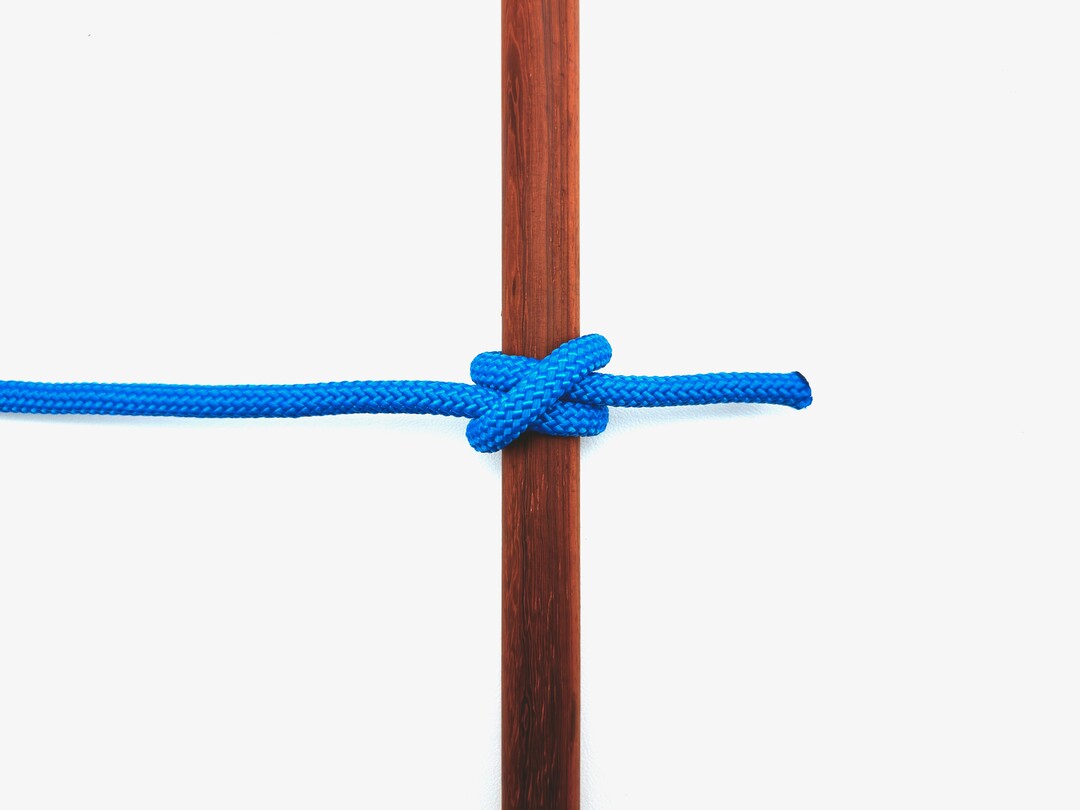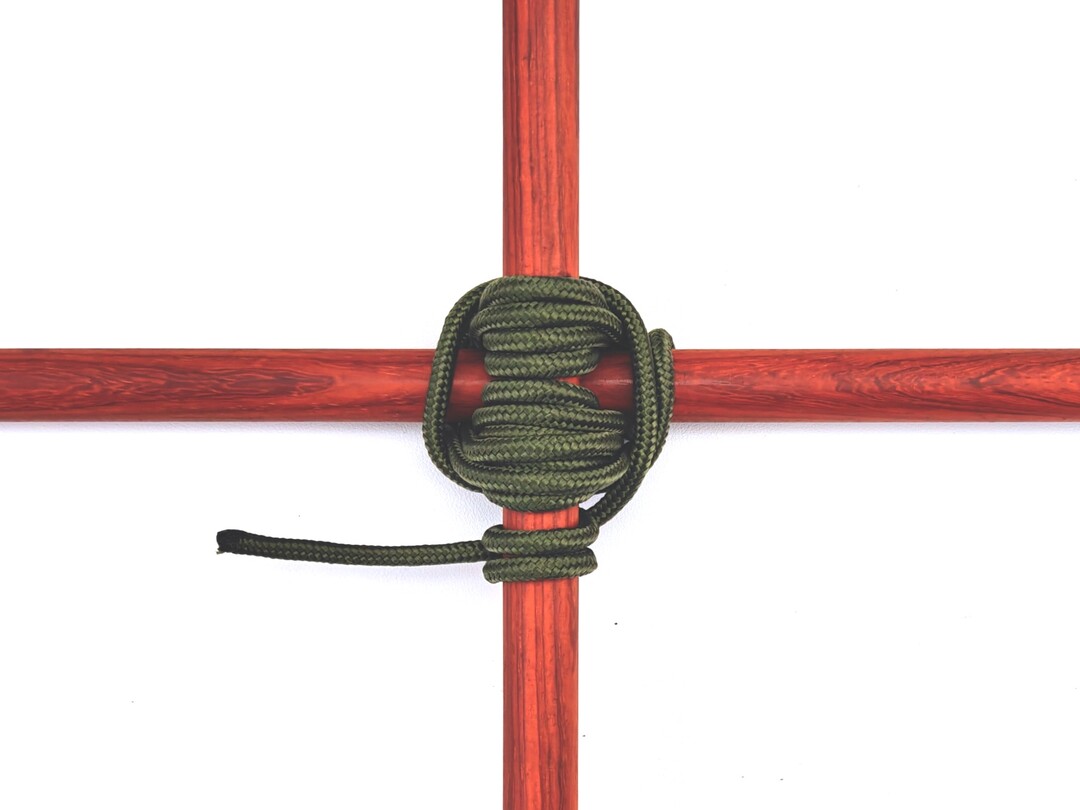
Step-by-Step Instructions
Step 1
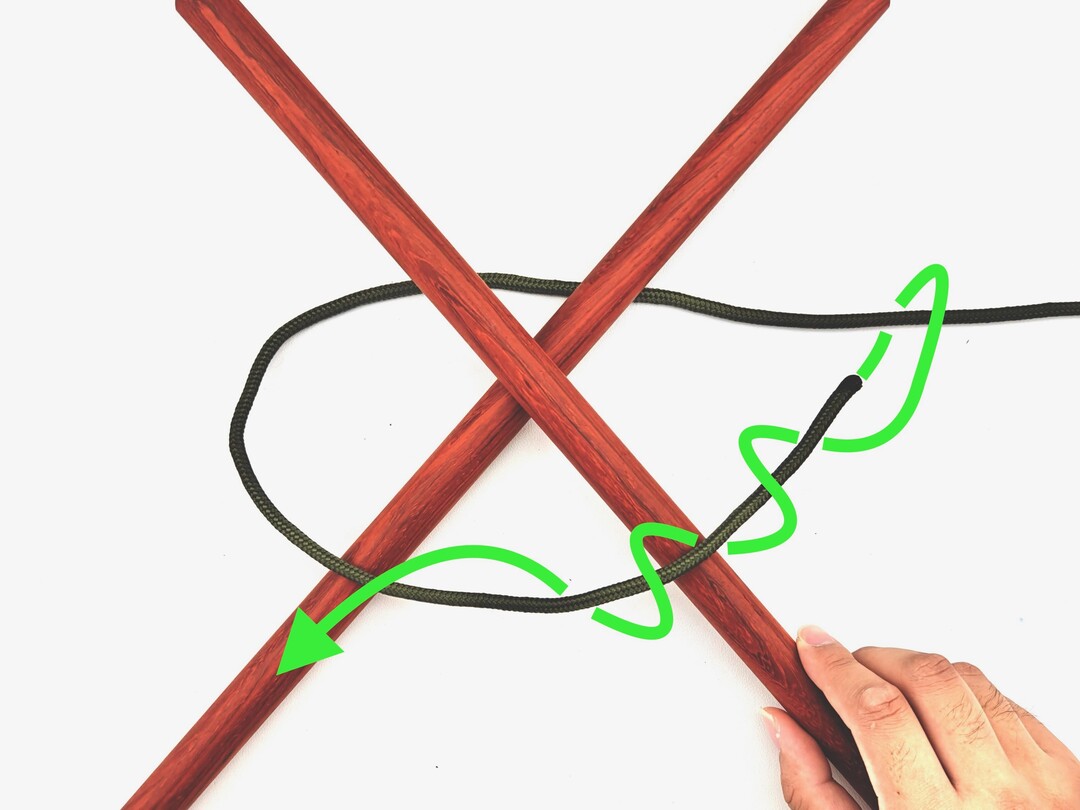
Step 2
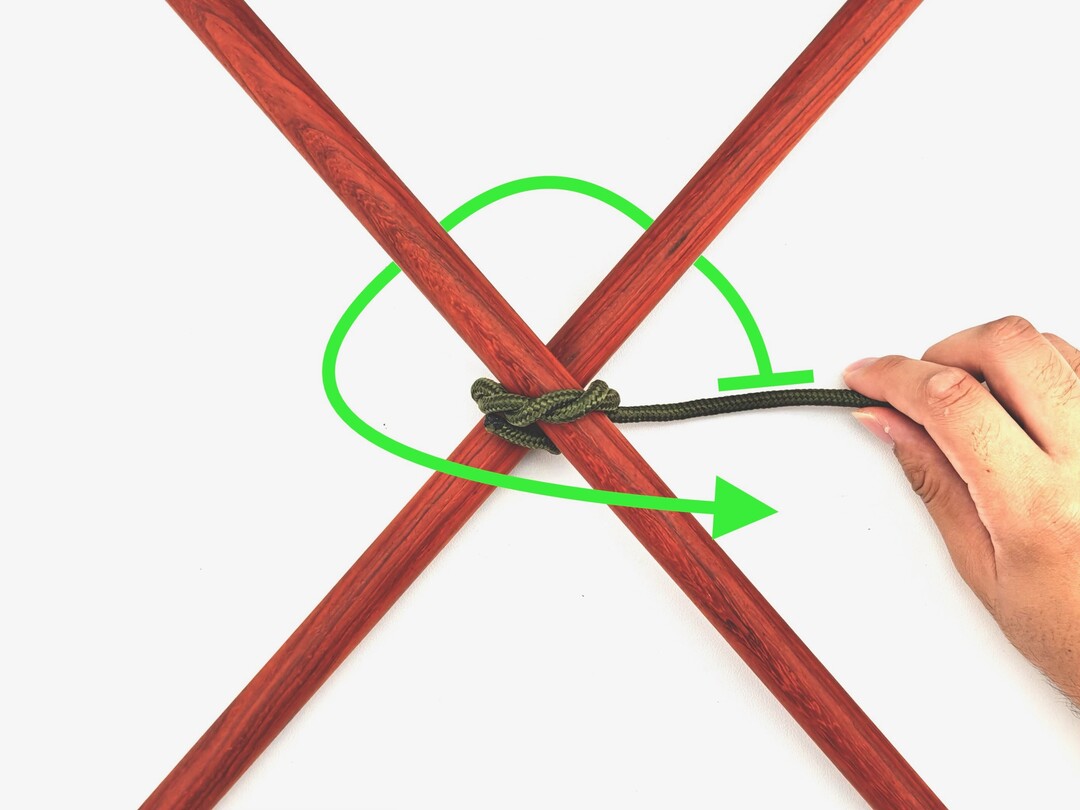
Step 3
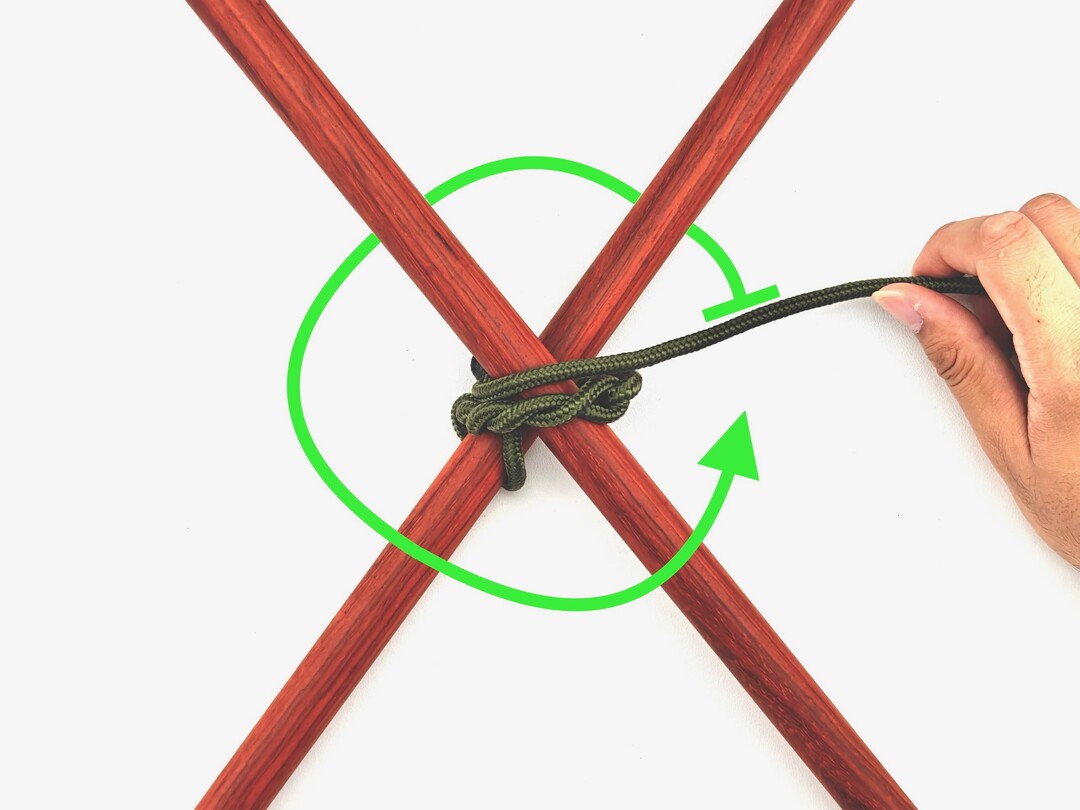
Step 4
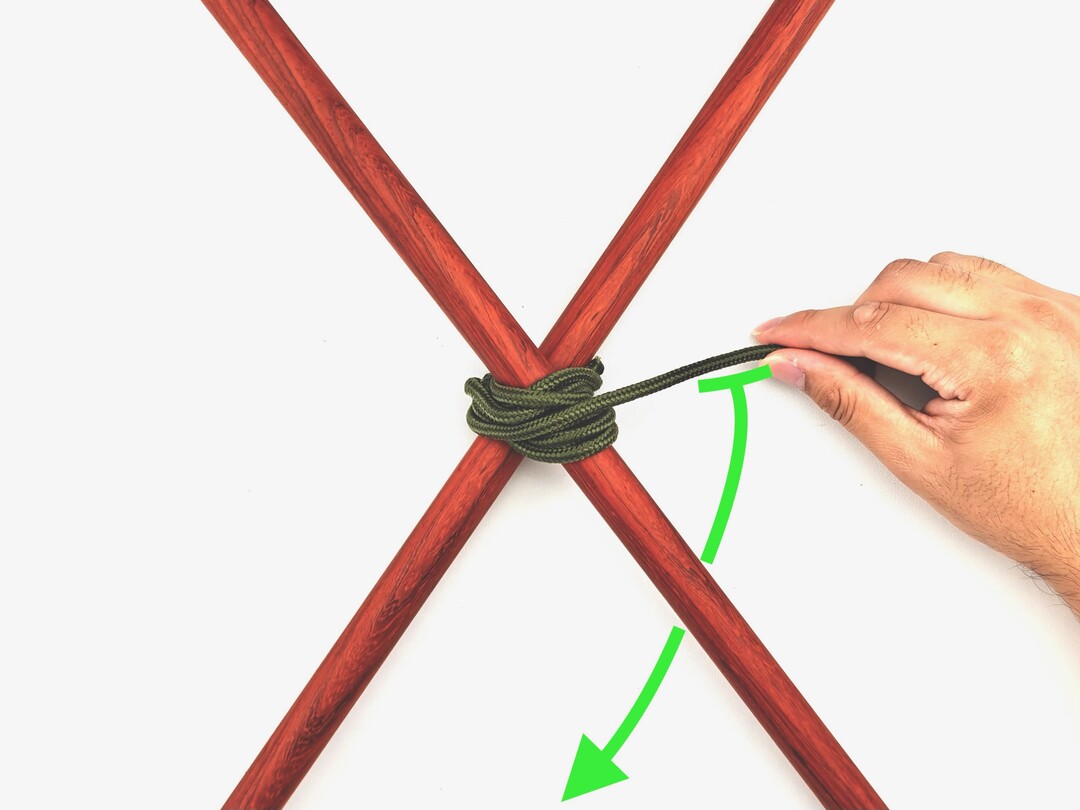
Step 5
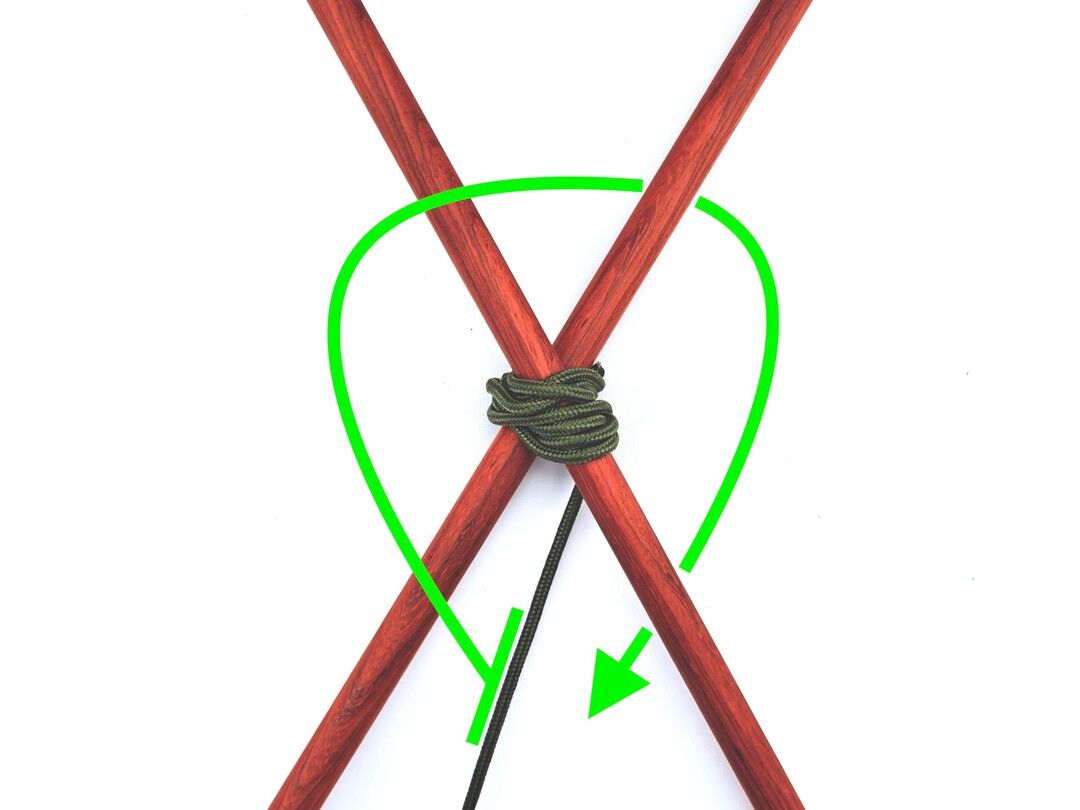
Step 6
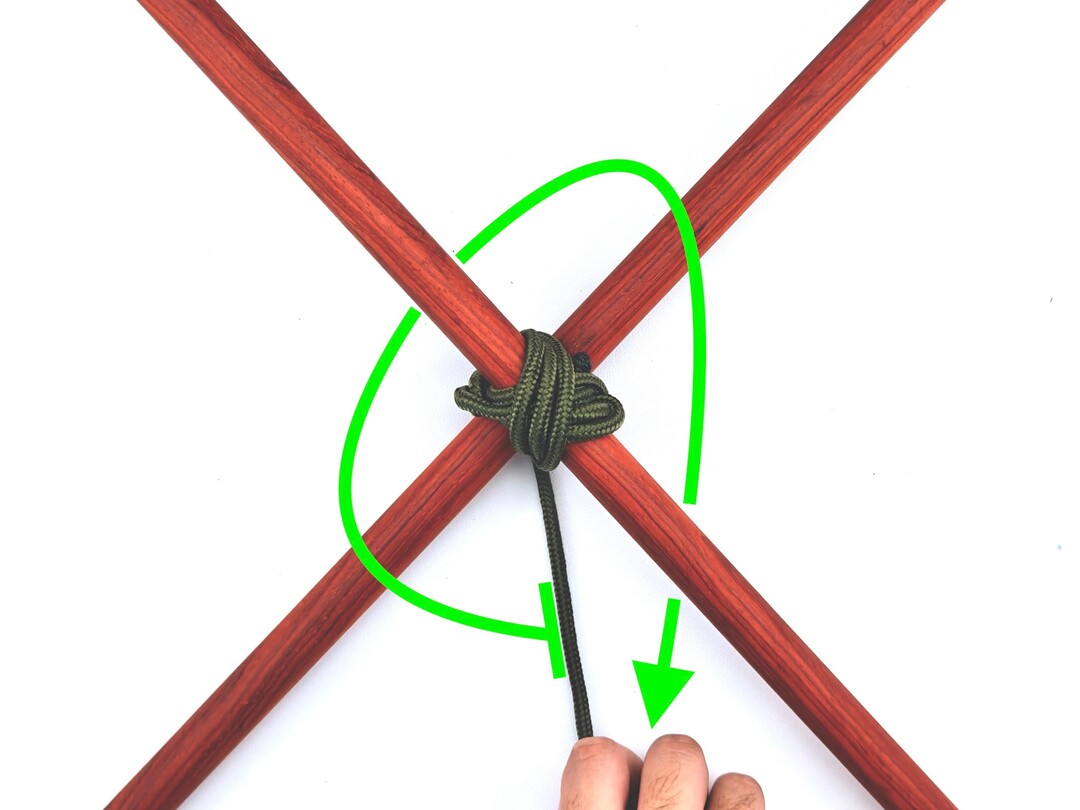
Step 7
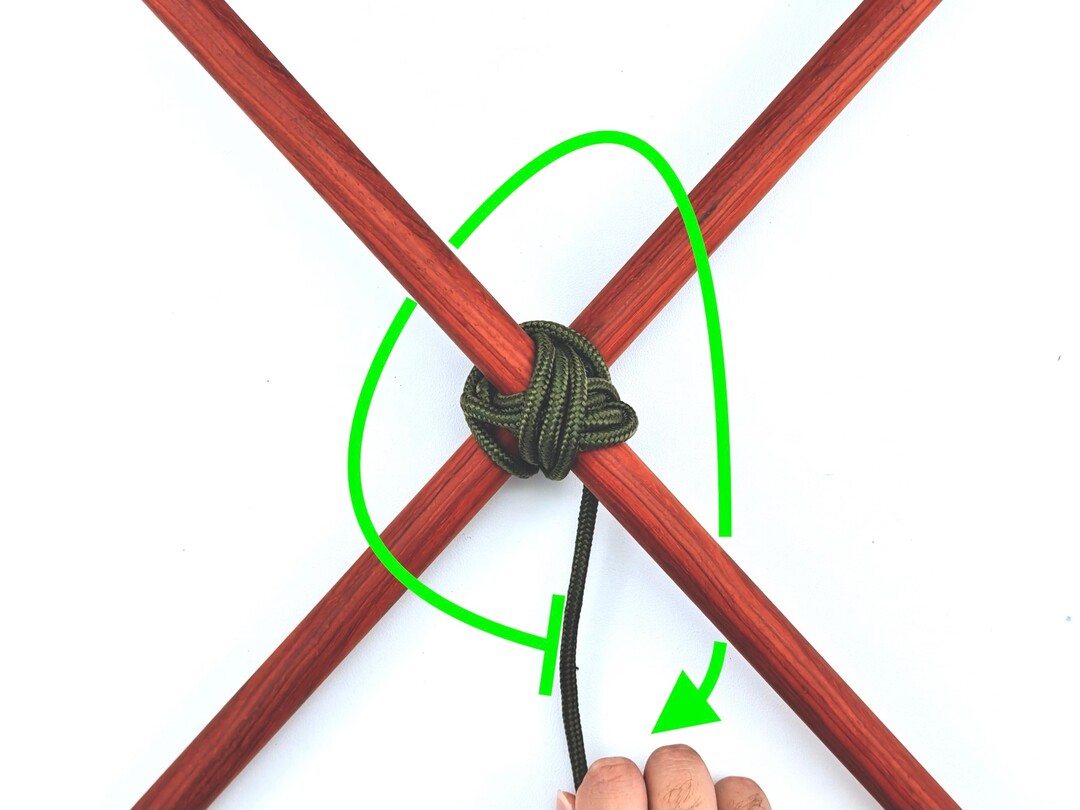
Step 8
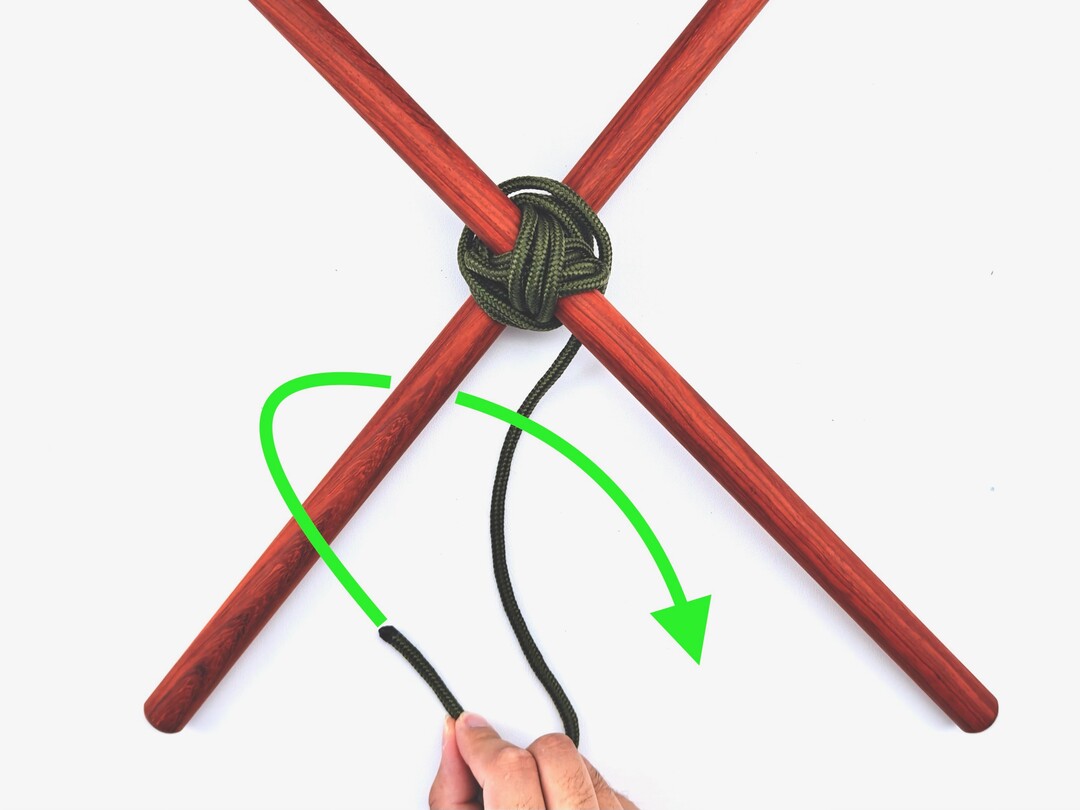
Step 9
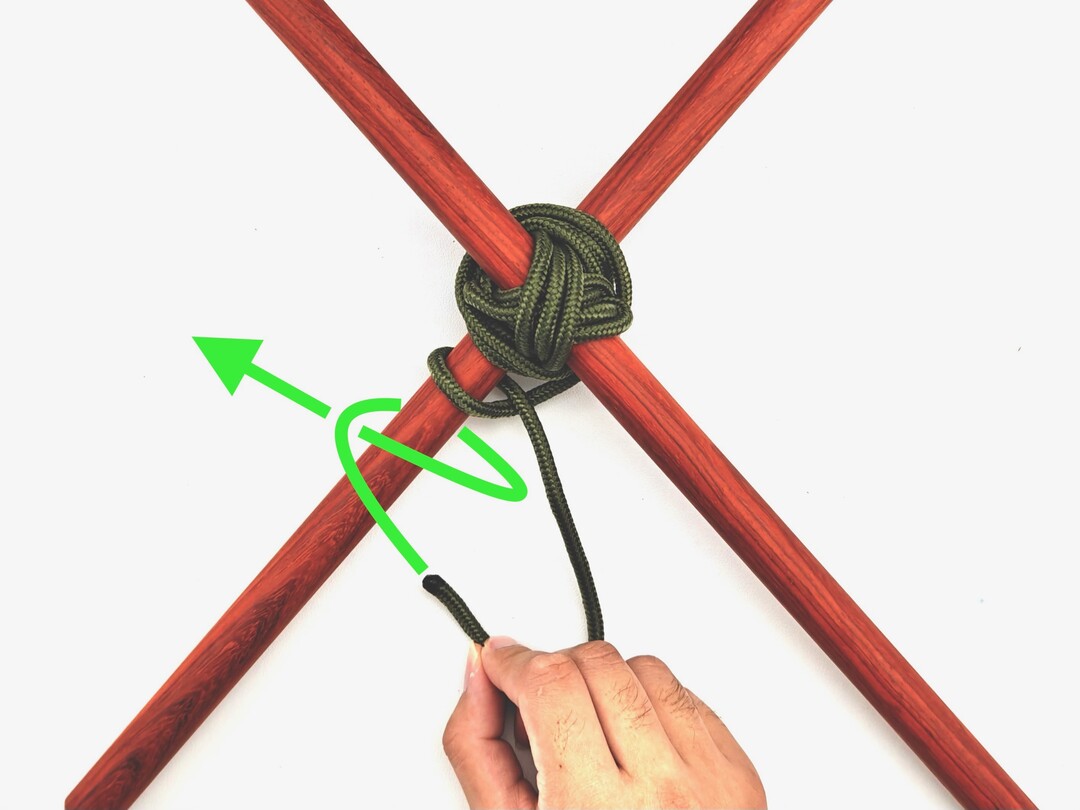
Step 10

Diagonal Lashing
Binds diagonal poles for structural bracing
The Diagonal Lashing is used to secure two spars or poles crossing at angles, commonly in pioneering and scouting for temporary structures. It starts with a Timber Hitch to pull poles together, followed by wraps and frapping turns to tighten the lashing, and finishes with a Clove Hitch. Ideal for cross-bracing where poles do not initially touch, it provides stability in lightweight to moderate-weight applications.
Advantages
Secures poles at various angles, enhancing structural rigidity. Effective for cross-bracing and can be combined with Square Lashing for added strength. Works well with lightweight to moderate loads.
Disadvantages
Not suitable for heavy-duty or permanent structures. May loosen under prolonged stress or extreme loads.
